写在前面:guolin肯定是个大神。就凭他能用一本书把Android讲得如此透彻也是个大神。但纸质书最大的问题就是会过时,所以开个新坑,记录这本书遇到的一些问题
纸质书的版本:2020.04版(2020.05重印)
2020-11-06 更新
Android Studio 4.1
内部版本号 #AI-201.8743.12.41.6858069, 构建于 September 23, 2020
运行时版本: 1.8.0_242-release-1644-b01 amd64
kotlin 1.3.72-release-Studio4.1-5
Chapter3:
-
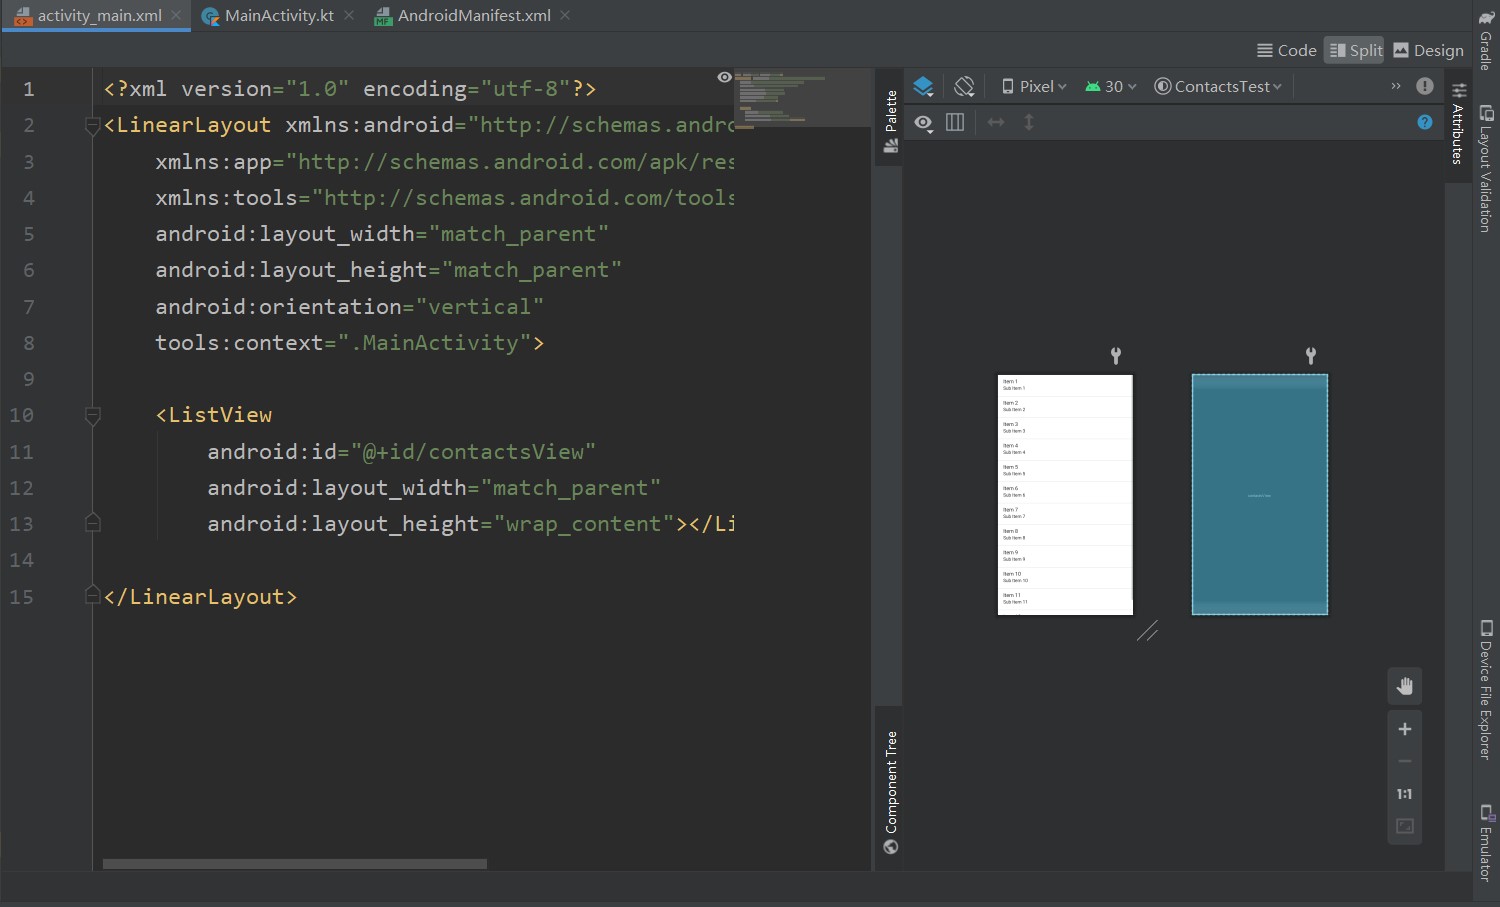
首先 Google 现在十分坑爹的把 xml 设计页一分为三(而不是这本书上的一分为二),增加了一个可视化编辑与代码共存的 Split 页。而且默认是可视化的设计页。Google 就这么觉得可视化设计很舒服么?
新建 activity 向下兼容的选项已经没了
这玩意没啥影响其实android x 的选项也没了,guolin 确实是预言家。
-
最新版本的 Android studio 新建项目的时候不会自动引入 kotlin-android-extensions 插件(也可能是我 AS 出 bug 了,反正我重装以后就会一直不引入),需要在
app的build.gradle里引入 id 自动导入插件:plugins { id 'com.android.application' id 'kotlin-android' id 'kotlin-android-extensions' }
Chapter 7
如今 Android studio 已经自带了查看数据库的功能了,所以书上的插件其实不用安装也 OK ,Google 的说明(国内应该打不开)

但是这个要求 API 26 以上,而且应用没在运行的时候是看不了数据库的(似乎不是查看db文件的)
Chapter 8
p324 的 Manifest 是 android 下的,而不是 java.util 的。所以写进程序的时候前面会加上 android 的前缀。
Chapter 9
项目遇到了一个bug,从相册返回主mainactivity时没有照片显示,所以把出bug的代码先记录下来,以后解决:
这是mainactivity的
package com.ti.cameraalbumtest

import android.app.Activity
import android.content.Intent
import android.graphics.Bitmap
import android.graphics.BitmapFactory
import android.graphics.Matrix
import android.media.ExifInterface
import android.net.Uri
import android.os.Build
import androidx.appcompat.app.AppCompatActivity
import android.os.Bundle
import android.provider.MediaStore
import android.util.Log
import androidx.core.content.FileProvider
import kotlinx.android.synthetic.main.activity_main.*
import java.io.File
import java.net.URI

class MainActivity : AppCompatActivity() {

    //button1
    val takePhoto = 1
    lateinit var imageUri:Uri
    lateinit var outputImage:File

    //button2
    val fromAlbum = 2

    override fun onCreate(savedInstanceState: Bundle?) {
        super.onCreate(savedInstanceState)
        setContentView(R.layout.activity_main)

        takePhotoButton.setOnClickListener {
            //file object
            outputImage = File(externalCacheDir,"output_image.jpg")
            //exist
            if(outputImage.exists()){
                outputImage.delete()
            }
            outputImage.createNewFile()
            //API judge,兼容性处理
            imageUri = if(Build.VERSION.SDK_INT>=Build.VERSION_CODES.N){
                // need to unit in Manifest.xml
                FileProvider.getUriForFile(this,"com.ti.cameraalbumtest.fileprovider",
                outputImage)
            }else{
                Uri.fromFile(outputImage)
            }
            //Set up CAMERA
            val intent_camera = Intent("android.media.action.IMAGE_CAPTURE")
            intent_camera.putExtra(MediaStore.EXTRA_OUTPUT,imageUri)
            startActivityForResult(intent_camera,takePhoto)
        }

        getPhotoFromAlbum.setOnClickListener {
            //文件选择器
            val intent_album = Intent(Intent.ACTION_OPEN_DOCUMENT)
                //只访问可以被共享的文件
            intent_album.addCategory(Intent.CATEGORY_OPENABLE)
                //文件格式:图片
            intent_album.type="image/*"
            //下一个activity销毁后返回fromdlbum值
            startActivityForResult(intent_album,fromAlbum)
        }
    }

    override fun onActivityResult(requestCode: Int, resultCode: Int, data: Intent?) {
        super.onActivityResult(requestCode, resultCode, data)
        when(requestCode){
            takePhoto->{
                if(resultCode==Activity.RESULT_OK){
                    //show the photo photoed
                    val bitmap = BitmapFactory.decodeStream(contentResolver.
                        openInputStream(imageUri))
                    photoImageMe.setImageBitmap(rotatedIfRequired(bitmap))
                }
            }
            fromAlbum->{
                if(requestCode==Activity.RESULT_OK&&data!=null){
                    data.data?.let { uri ->
                        //the second data=getData()
//                        if(uri==null){
//                            Log.d("emptyResult","uri is empty")
//                        }
                        val bitmap = getBitmapFromUri(uri)
//                        if(bitmap==null){
//                            Log.d("emptyResult","bitmap is empty")
//                        }
                        photoImageMe.setImageBitmap(bitmap)
                    }
                }
            }
        }
    }

    private fun rotatedIfRequired(bitmap: Bitmap):Bitmap{
        //exif object: infor + jpeg
        val exif = ExifInterface(outputImage.path)
        //direction information
        val orientation = exif.getAttributeInt(ExifInterface.TAG_ORIENTATION,
            ExifInterface.ORIENTATION_NORMAL)
        // spin/rotate
        return when(orientation){
            ExifInterface.ORIENTATION_ROTATE_90 -> rotateBitmap(bitmap,90)
            ExifInterface.ORIENTATION_ROTATE_180 -> rotateBitmap(bitmap,180)
            ExifInterface.ORIENTATION_ROTATE_270 -> rotateBitmap(bitmap,270)
            //do nothing if no degree
            else -> bitmap
        }
    }

    private fun rotateBitmap(bitmap: Bitmap,degree:Int):Bitmap{
        //矩阵程序
        val matrix = Matrix();
        //旋转矩阵到一定的角度
        matrix.postRotate(degree.toFloat())
        val rotatedBitmap = Bitmap.createBitmap(bitmap,0,0,bitmap.width,bitmap.height,
                        matrix,true)
        bitmap.recycle()//回收矩阵
        return rotatedBitmap
    }

    private fun getBitmapFromUri(uri: Uri) = contentResolver.openFileDescriptor(uri,"r")?.use {
        BitmapFactory.decodeFileDescriptor(it.fileDescriptor)
    }
}
这是对应的xml
<?xml version="1.0" encoding="utf-8"?>
<LinearLayout xmlns:android="http://schemas.android.com/apk/res/android"
    xmlns:app="http://schemas.android.com/apk/res-auto"
    xmlns:tools="http://schemas.android.com/tools"
    android:layout_width="match_parent"
    android:layout_height="match_parent"
    android:orientation="vertical"
    tools:context=".MainActivity">

    <Button
        android:id="@+id/takePhotoButton"
        android:layout_width="match_parent"
        android:layout_height="wrap_content"
        android:text="点我拍照"></Button>

    <Button
        android:id="@+id/getPhotoFromAlbum"
        android:layout_width="match_parent"
        android:layout_height="wrap_content"
        android:text="点我从相册选择图片"></Button>

    <ImageView
        android:id="@+id/photoImageMe"
        android:layout_width="wrap_content"
        android:layout_height="wrap_content"
        android:layout_gravity="center_horizontal"></ImageView>

</LinearLayout>
这是manifest文件:
<?xml version="1.0" encoding="utf-8"?>
<manifest xmlns:android="http://schemas.android.com/apk/res/android"
    package="com.ti.cameraalbumtest">

    <uses-permission android:name="android.permission.WRITE_EXTERNAL_STORAGE"></uses-permission>

    <application
        android:allowBackup="true"
        android:icon="@mipmap/ic_launcher"
        android:label="@string/app_name"
        android:roundIcon="@mipmap/ic_launcher_round"
        android:supportsRtl="true"
        android:theme="@style/Theme.CameraAlbumTest">

        <provider
            android:authorities="com.ti.cameraalbumtest.fileprovider"
            android:name="androidx.core.content.FileProvider"
            android:exported="false"
            android:grantUriPermissions="true">
            <meta-data
                android:name="android.support.FILE_PROVIDER_PATHS"
                android:resource="@xml/file_paths"></meta-data>
        </provider>
        <activity android:name=".MainActivity" android:screenOrientation="portrait">
        <!--    Not in the book, but in source codes        -->
            <intent-filter>
                <action android:name="android.intent.action.MAIN" />

                <category android:name="android.intent.category.LAUNCHER" />
            </intent-filter>
        </activity>
    </application>

</manifest>
2020-11-22 更新
补充 Android Studio 中 git 的使用
首先再次强调我的 AS 的版本,
Android Studio 4.1
内部版本号 #AI-201.8743.12.41.6858069, 构建于 September 23, 2020
运行时版本: 1.8.0_242-release-1644-b01 amd64
JVM: OpenJDK 64-Bit Server VM by JetBrains s.r.o
我电脑里最新版本的 pycharm 和 webstorm 的 git 登录方法和 AS 的不太一样,不过大家都是jetbrains 家的软件,想必 AS 下一步也会更新到这个版本。只是时间问题。(也可能是已经更新了但我没更新软件所以不知道)
前言
guolin 在书中写的很好,命令行格式的 git 命令是每个程序员应该掌握的技能,但不得不说图形化更容易操作。所以我简单补充下图形化的操作方法。
基础搭建
首先你需要有一个 git ,然后配置正确的用户名和邮箱,如果你这步有问题的话网上有一大堆教程,我以后可能也会写一个出来。书里也有教程。
需要在 android studio 的设置(settings)里配置 git.exe 的位置,AS 会自动找到的,没有的话你手动找一下就行。
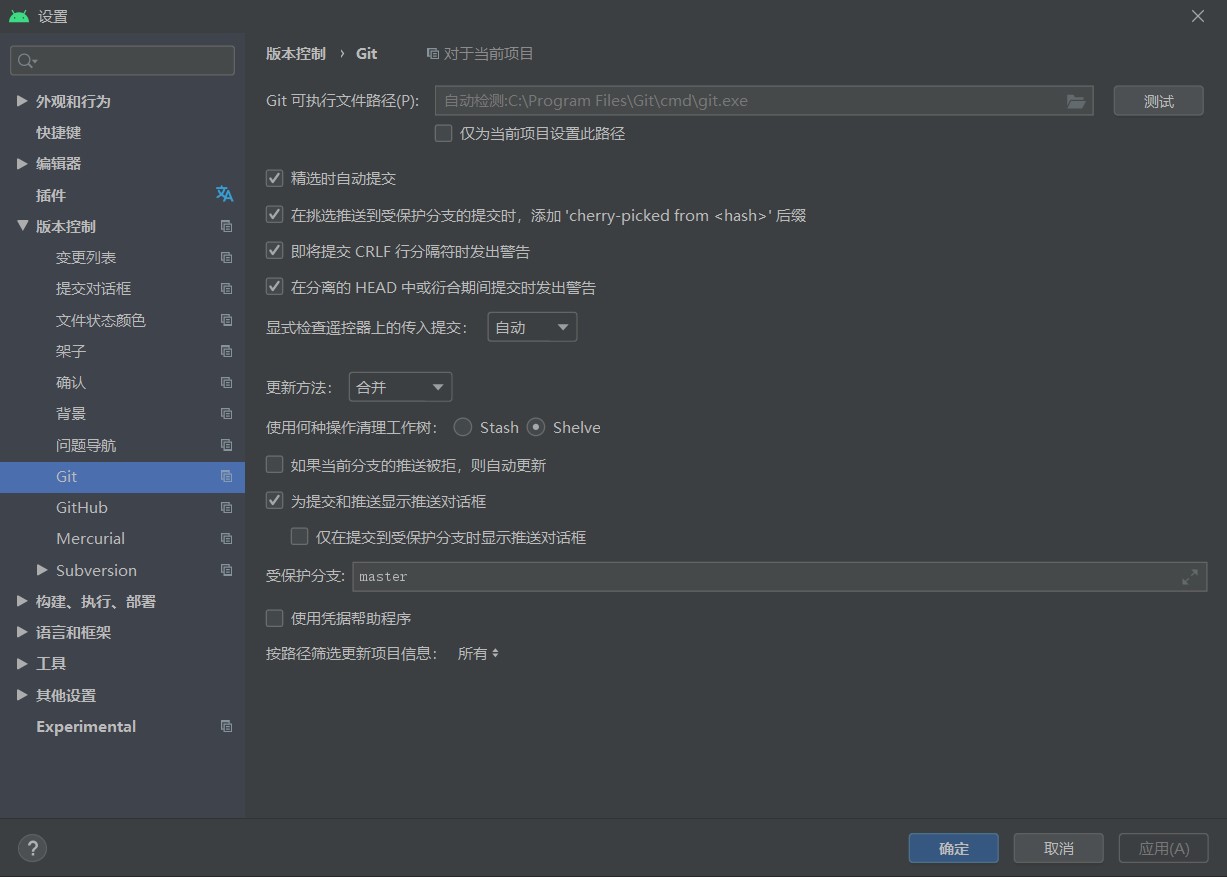
在下面的 github 里配置你的账号密码,然后登录。

这一步可能会报 401 错误,网上的解决办法有很多,比如在网址前面加一个 https:// ,或者改账号为你的用户名,或者你可以直接用右上角的 token 登录。去 github 的网站申请一个 token 。申请的方法就是点击 头像 - settings - develop settings - general access tokens。为 AS 申请一个 token ,然后将 token 输入进来就可以。
注意 : token 需要 repo,gist,read:org权限。
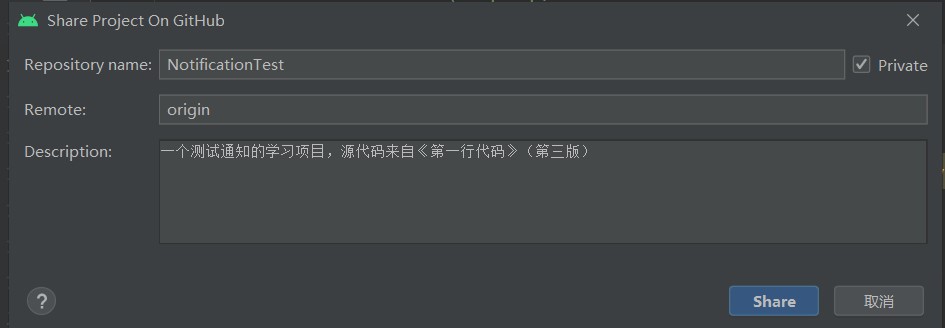
本地项目上传到 github
点击 VCS ,上传到版本控制(version control),有一个 share project on github,AS 会检测 github 上有没有重名的 resposity ,没有会提示你新建一个。这里新建的话,只能填写库名和描述,选择公开性。不能初始化 readme 和 license 文件。
然后就是正常的git操作了,和其他 jetbrains 家的软件一样,commit,push 和 ferch。都可以在VCS 的菜单里解决。
直接拉取远程项目到本地
Android Studio 首页有从 github 拉取项目的选项,直接操作即可。
其他
如果你使用的是 gitee ,你需要在扩展商店(plugins-marketplace)里找一个 gitee 插件,
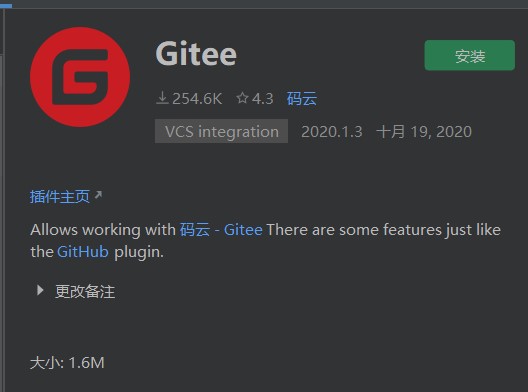
然后设置-版本控制里 github 附近会多出一个 gitee ,操作和 github 类似,这里就不写了。(其实 github 相关功能本身也是 AS 的一个插件,只不过因为预装的原因看起来像是 AS 的一部分)
Chapter 10
如果你的 SDK 是 Android R(11),IntentService 方法会显示被废弃,这很正常,因为它确实被废弃了。废弃又不耽误你用,在乎那么多干啥😒
具体可以参考这篇博客:链接
2020-11-25 更新
Apache 服务器的使用(Chapter 11)
书上关于这个 Apache 服务器并没有说明太多,所以我补充一点东西。
下载与安装
首先我建议你下载和安装时参考网上的一些教程。你从 Apache 官网是下不到二进制exe文件的,只能下载到压缩包(我倒不是很意外,毕竟 tomcat 和 maven 都是压缩包,一个组织下的 httpd 不至于用别的),所以书上的无脑 next 教程并不适用。
首先解压下载的文件,到Apache24\conf里找httpd.conf文件,找到Define SRVROOT,把它从默认的c:/Apache24改成你解压的正确的 Apache24 路径,比如我的是:
D:/privatePrograms/httpd-2.4.46-o111h-x64-vc15/Apache24
注意改下斜杠。
然后将 httpd 的服务注册到系统里。需要用管理员权限在httpd.exe所在的根目录执行以下命令:
.\httpd -k install
注册成功的话会有提示信息的。这时可以去系统的服务里看有没有 Apache 开头的服务。
启动
启动的方式可以在目录下直接执行httpd.exe,或者双击执行。会有一个窗口,关窗口就是停止了。可能会有接口占用的问题,表现为:
- Windows 警告:
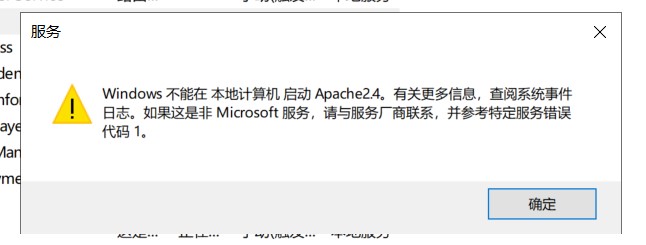
- 命令行界面执行会直接告诉你接口被占用。
(OS 10013)以一种访问权限不允许的方式做了一个访问套接字的尝试。 : AH00072: make_sock: could not bind to address [::]:80
(OS 10013)以一种访问权限不允许的方式做了一个访问套接字的尝试。 : AH00072: make_sock: could not bind to address 0.0.0.0:80
AH00451: no listening sockets available, shutting down
AH00015: Unable to open logs
解决办法:
- 改 httpd 的接口,在刚才的 conf 文件里找
listen 80,这是默认的监听接口,改成别的就 ok。 - 把占用的程序停止。首先要找到占用的程序。
netstat -ano查看接口占用,tasklist|findstr 进程PID找到程序信息,我的是 VMWare 的托管程序占用了,所以去任务管理器里关掉就可以了。
访问:
- 访问
localhost:80(接口号改了就用你改完的) - 访问
127.0.0.1